> ## Documentation Index
> Fetch the complete documentation index at: https://docs.yuko.so/llms.txt
> Use this file to discover all available pages before exploring further.
> Manage reviews and settings for multiple stores from a single Yuko account.
# 11.3 Multi-Store Management
### **Navigation**
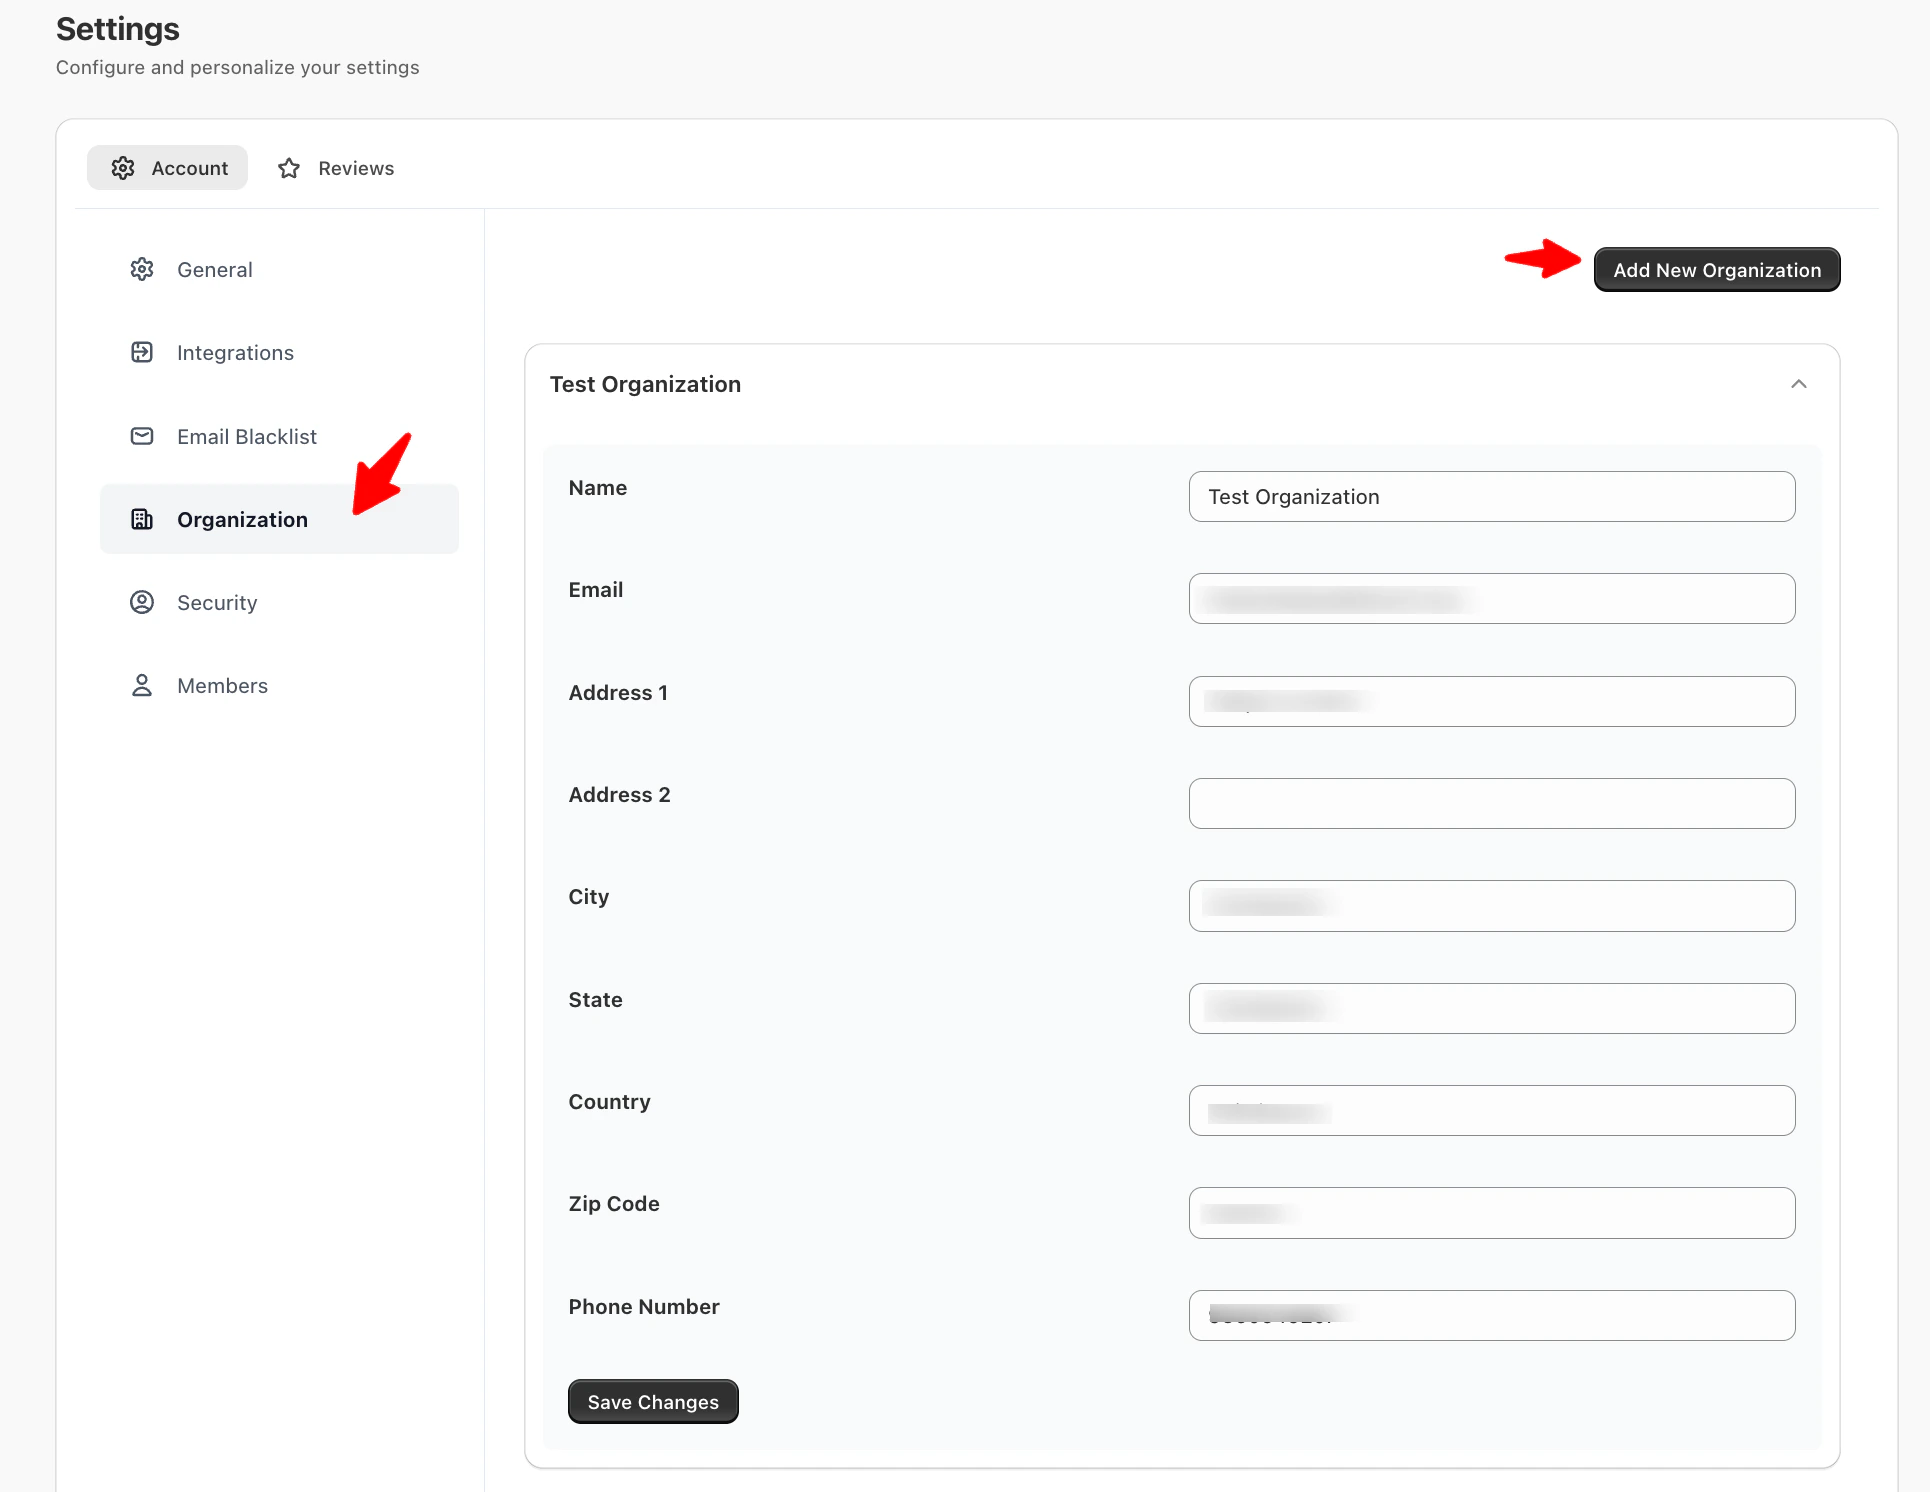
**Yuko Dashboard → Settings → Account → Organization**
 ### **Overview**
Manage and organize business details for your account.
Organizations allow you to manage multiple business entities under one Yuko account. Each organization can have its own members, settings, and reporting.\
\
This section lets you update your organization’s information and also add new organizations — useful if you manage multiple brands or clients under one Yuko account.
### **Available Fields**
| **Field** | **Description** |
| :------------------------ | :---------------------------------------------------------------- |
| **Name** | The official name of your organization or brand. |
| **Email** | The main contact email for admin notifications and communication. |
| **Address 1 & Address 2** | Specify your business address for emails and records. |
| **City** | The city where your organization is based. |
| **State** | The state or region of your organization. |
| **Country** | The country your business operates in. |
| **Zip Code** | Postal code associated with your business address. |
| **Phone Number** | Contact number for your organization or support line. |
### **Adding a New Organization**
Navigation: **Yuko Dashboard → Settings → Account → Organization**
1. Click **Add New Organization**.
2. Enter the following details:
* **Name:** Organization name.
* **Email:** Official email address for notifications.
* **Address 1 & 2:** Street address.
* **City, State, Country, ZIP Code**
* **Phone Number**
3. Click **Create Organization**.
4. The new organization will appear in the list.
### **Managing Multiple Organizations**
* Repeat the above steps to add more organizations.
* Switching Between Organizations: In the top-right corner of the dashboard, you’ll see a **dropdown menu** displaying the currently selected organization.
### **Overview**
Manage and organize business details for your account.
Organizations allow you to manage multiple business entities under one Yuko account. Each organization can have its own members, settings, and reporting.\
\
This section lets you update your organization’s information and also add new organizations — useful if you manage multiple brands or clients under one Yuko account.
### **Available Fields**
| **Field** | **Description** |
| :------------------------ | :---------------------------------------------------------------- |
| **Name** | The official name of your organization or brand. |
| **Email** | The main contact email for admin notifications and communication. |
| **Address 1 & Address 2** | Specify your business address for emails and records. |
| **City** | The city where your organization is based. |
| **State** | The state or region of your organization. |
| **Country** | The country your business operates in. |
| **Zip Code** | Postal code associated with your business address. |
| **Phone Number** | Contact number for your organization or support line. |
### **Adding a New Organization**
Navigation: **Yuko Dashboard → Settings → Account → Organization**
1. Click **Add New Organization**.
2. Enter the following details:
* **Name:** Organization name.
* **Email:** Official email address for notifications.
* **Address 1 & 2:** Street address.
* **City, State, Country, ZIP Code**
* **Phone Number**
3. Click **Create Organization**.
4. The new organization will appear in the list.
### **Managing Multiple Organizations**
* Repeat the above steps to add more organizations.
* Switching Between Organizations: In the top-right corner of the dashboard, you’ll see a **dropdown menu** displaying the currently selected organization.
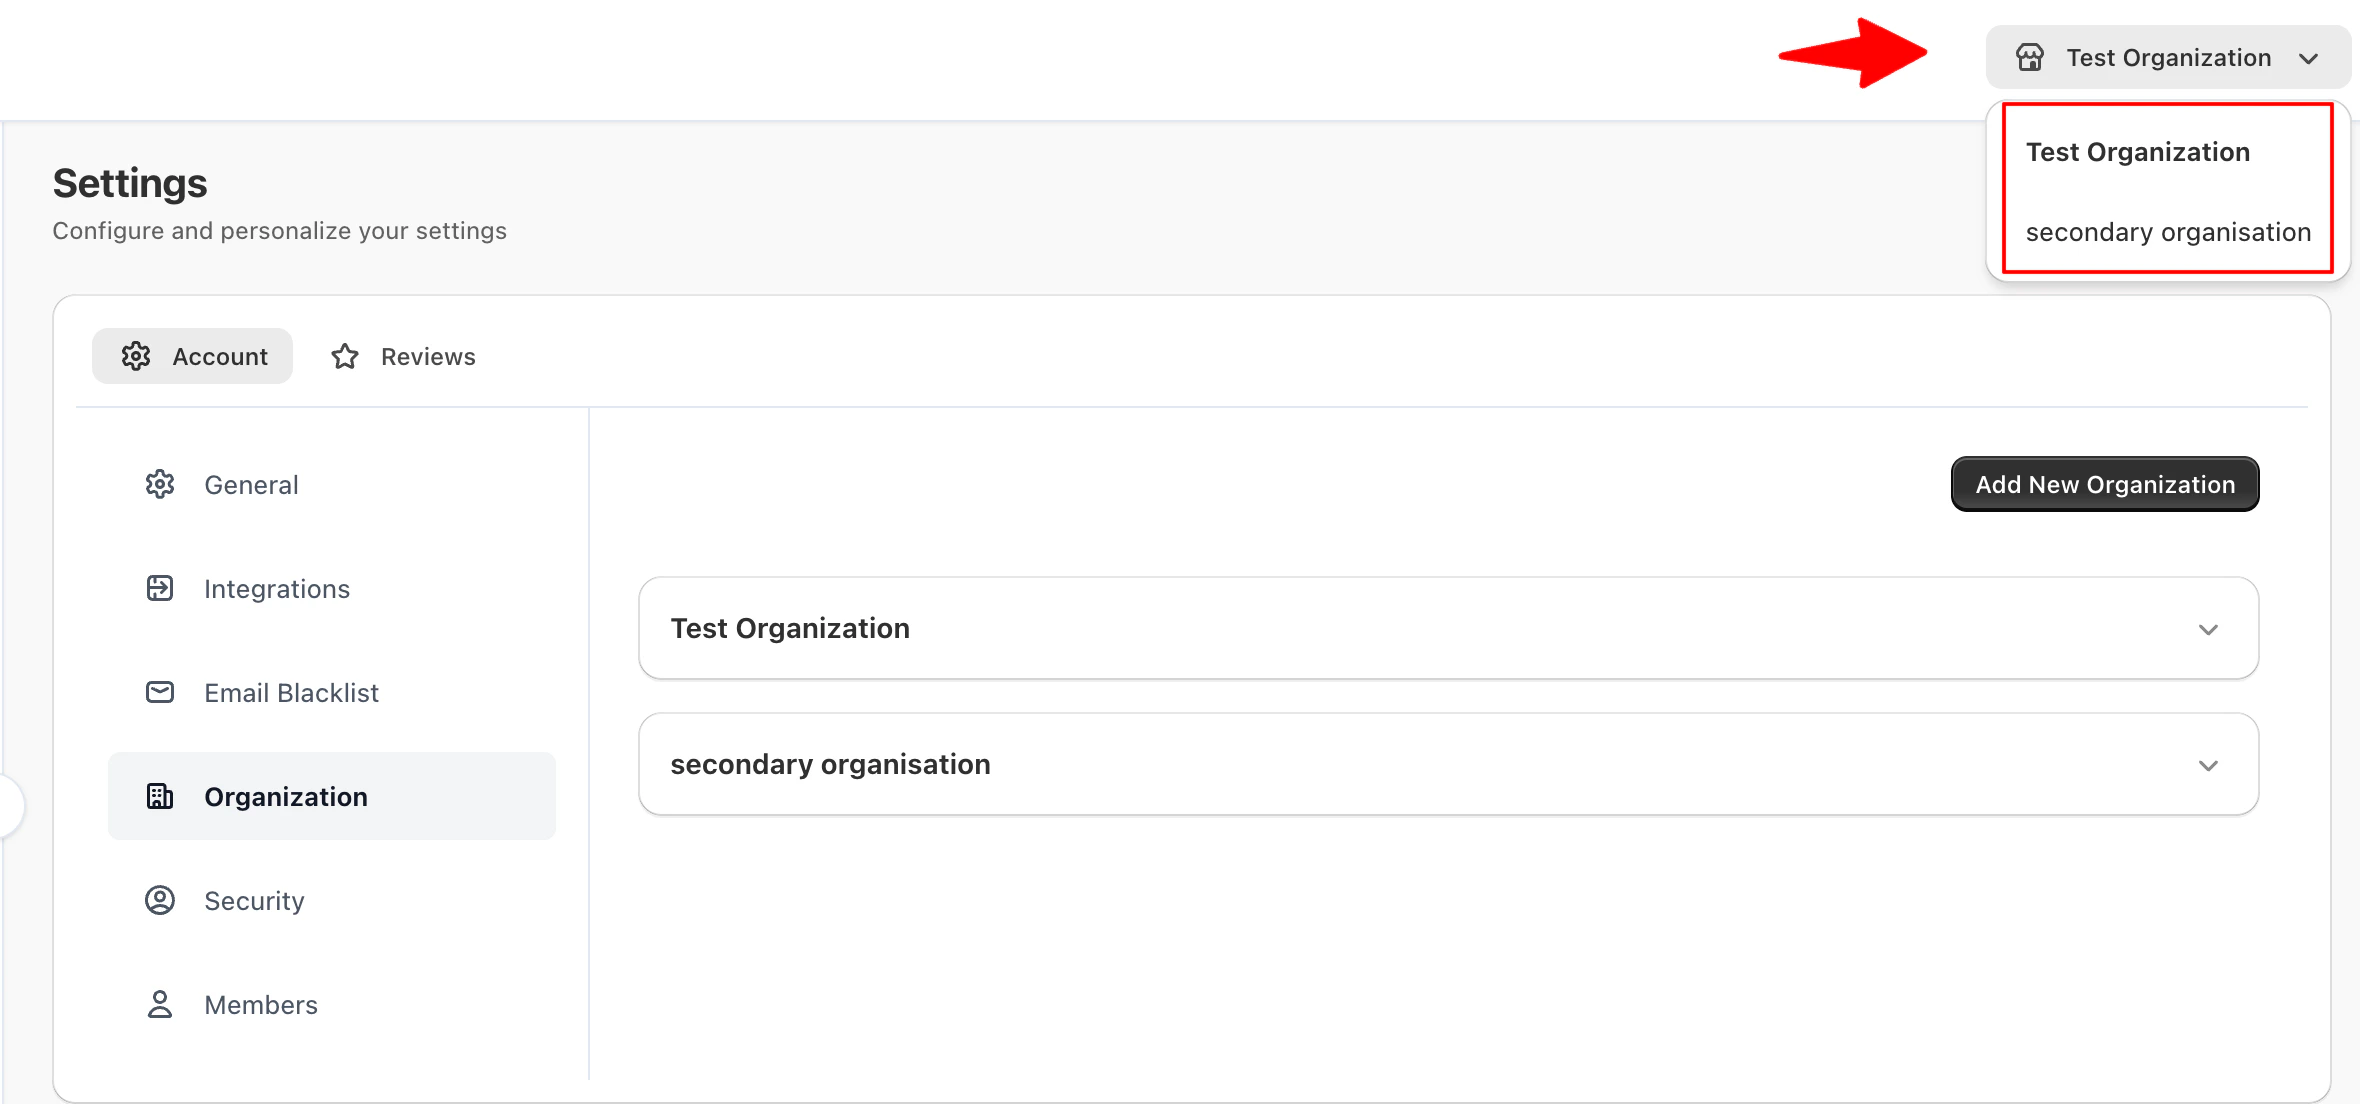 * Click the dropdown to select any of the organizations you’ve added.
* Once selected, all dashboard views, reports, and settings will correspond to the chosen organization.
### **Tips**
* Add all organizations you manage to quickly switch between them.
* Give each organization a clear and meaningful name to avoid confusion when selecting from the dropdown.
* Use the dropdown to confirm which organization you’re currently managing before making changes or sending notifications.
* Click the dropdown to select any of the organizations you’ve added.
* Once selected, all dashboard views, reports, and settings will correspond to the chosen organization.
### **Tips**
* Add all organizations you manage to quickly switch between them.
* Give each organization a clear and meaningful name to avoid confusion when selecting from the dropdown.
* Use the dropdown to confirm which organization you’re currently managing before making changes or sending notifications.